 TARIFF ALERT: Solar prices rising 25-40% in 2025 - Secure American-made independence NOW
DIY Solar Installation: Complete Beginner's Guide
Step-by-step instructions from first panel to final power-up. Build your own system and stop paying utility bills.
For Patriots Ready to Cut the Cord and Build Real Independence
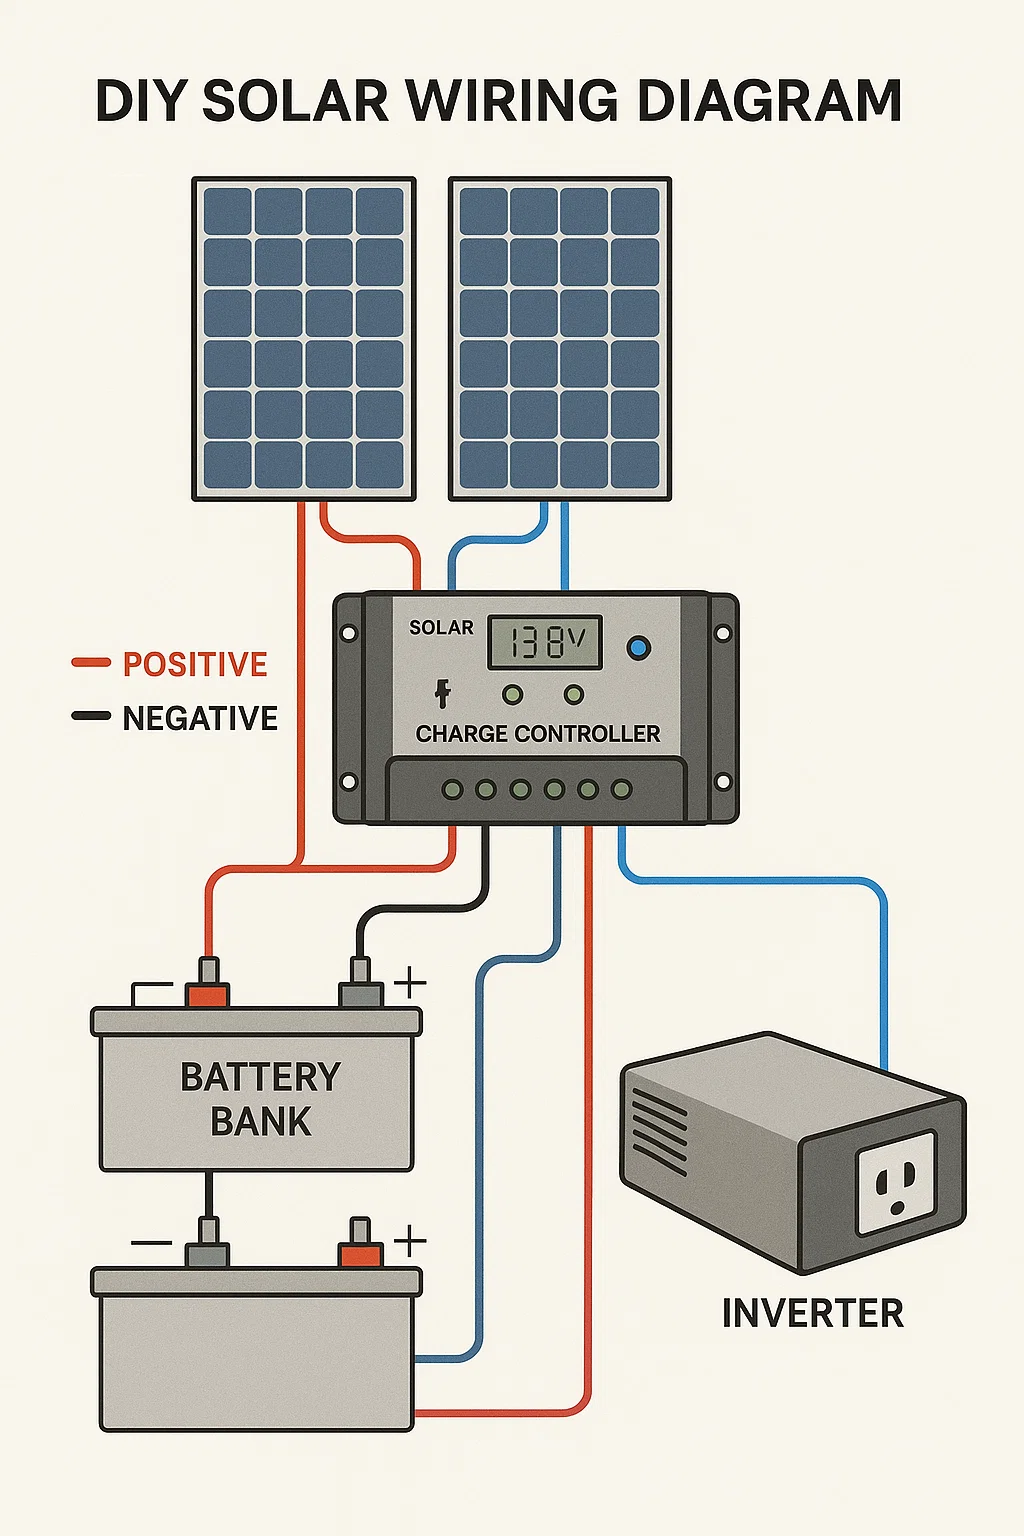
DIY solar installation saves 50-70% versus contractor quotes. Most beginners complete a basic system in 1-2 weekends. The key steps include: mounting panels, wiring the array, installing the charge controller, setting up batteries, and connecting the inverter. Safety comes first. Always disconnect power before working on connections. Check local permit requirements before starting.
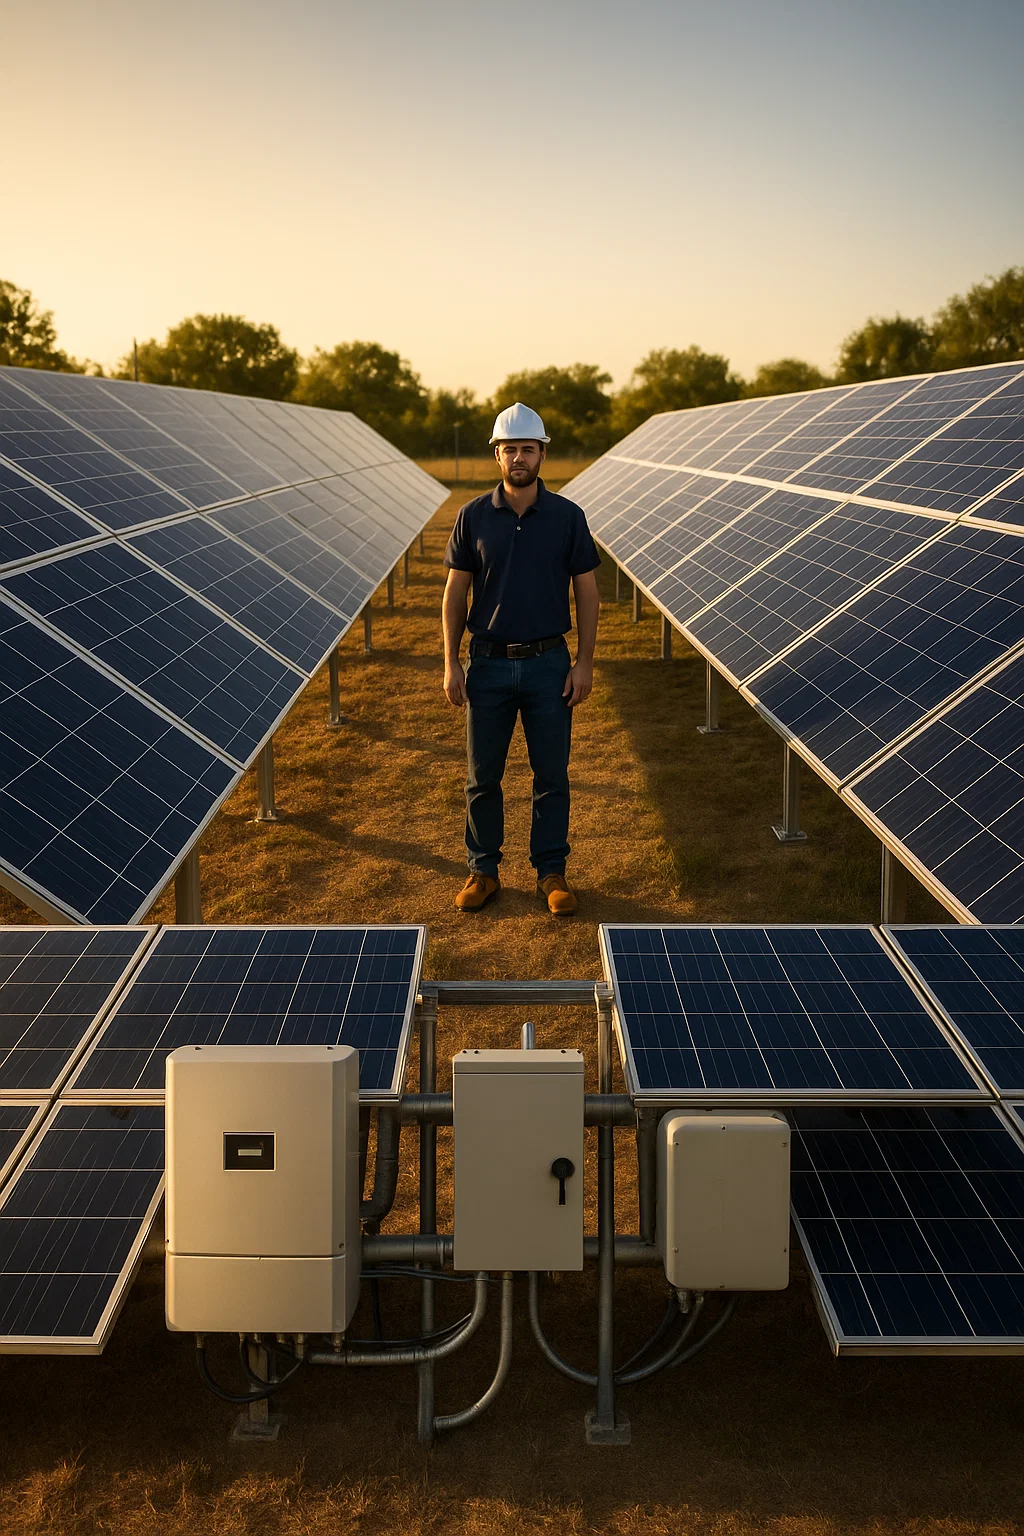
You watched your neighbor's lights stay on during the last blackout. His house glowed while the whole block sat dark. That solar array on his roof was collecting more than sunlight. It was collecting freedom. The question is simple: how long will you wait before building your own?
- Why DIY Solar Installation
- Tools and Equipment
- Safety Protocols
- Step 1: Plan Panel Placement
- Step 2: Install Mounting System
- Step 3: Mount Solar Panels
- Step 4: Wire the Array
- Step 5: Install Charge Controller
- Step 6: Set Up Battery Bank
- Step 7: Install Inverter
- Step 8: Ground the System
- Step 9: Test and Document
- FAQ
Free Solar System Sizing Calculator
Know exactly what size system you need before buying a single component.
Get Free CalculatorWhy DIY Solar Installation Saves Thousands
Professional solar installation quotes range from $15,000 to $30,000. Most of that cost is labor. The components themselves cost far less.
I learned this after paying a contractor $15,000. He undersized everything to pad his margins. The system shut down every time I used my electric kettle. Every. Single. Time.
That failure pushed me to get solar trained in Florida. Three months of intensive study. Now I help others avoid the same expensive mistakes.
The Real Cost Breakdown
| Component | DIY Cost | Contractor Quote |
|---|---|---|
| Solar Panels (2kW) | $1,500-$2,500 | $4,000-$6,000 |
| Battery Bank | $3,000-$5,000 | $6,000-$10,000 |
| Inverter | $800-$1,500 | $2,000-$3,500 |
| Charge Controller | $200-$500 | $500-$1,000 |
| Mounting/Wiring | $500-$1,000 | $2,000-$4,000 |
| TOTAL | $6,000-$10,500 | $14,500-$24,500 |
DIY solar installation cuts costs by 50-70%. That savings pays for quality components instead of contractor markup.
WATTSON'S DIY TRUTH: "The best system is the one you understand."
Contractors disappear when problems appear. I've seen it hundreds of times. The family that installs their own system knows every wire and connection. When something needs fixing at 2 AM during a storm, they fix it themselves. That knowledge is worth more than any warranty.
Tools and Equipment for DIY Solar Installation
Most homeowners own most of these tools already. The specialized items cost less than one hour of contractor labor.
Essential Tools
- Drill with assorted bits (cordless preferred)
- Wire cutters and strippers (insulated handles)
- Multimeter for testing connections
- Wrench set (metric and standard)
- Screwdriver set (Phillips and flathead)
- Crimping tool for connectors
- Level (laser level makes alignment easier)
- Measuring tape (25 feet minimum)
- Ladder rated for your weight plus equipment
Safety Equipment
- Insulated electrical gloves (rated for your system voltage)
- Safety glasses
- Hard hat for roof work
- Non-slip footwear
- Safety harness for steep roofs
System Components
- Solar panels sized for your power needs
- Mounting rails and hardware
- MPPT charge controller
- Battery bank (LiFePO4 recommended)
- Pure sine wave inverter
- Properly sized wiring with MC4 connectors
- Disconnect switches and fuses
- Grounding equipment
Safety Protocols for DIY Solar Installation
CRITICAL WARNING: Solar systems generate electricity that can injure or kill. Never work on live connections. Always disconnect power sources first. If any step feels uncomfortable, consult a licensed electrician.
Non-Negotiable Safety Rules
Rule 1: Never work on live electrical connections. Disconnect everything first.
Rule 2: Solar panels generate power from any light. Cover panels with opaque material during installation.
Rule 3: Use insulated tools when working near electrical components.
Rule 4: Never work alone. Have someone nearby for emergencies.
Rule 5: Respect heights. Secure ladders properly. Use harnesses on steep roofs.
Rule 6: Check local codes and permit requirements. Use our OffGridPowerHub GPT for location-specific guidance.
Step 1: Plan Your Panel Placement
Panel Placement Planning
Proper placement determines system performance. A few hours of planning saves years of suboptimal output.
Orientation
Northern Hemisphere panels face true south. Southern Hemisphere panels face true north. Use a compass app and adjust for magnetic declination.
Tilt Angle
Optimal year-round angle equals your latitude. Add 15 degrees for winter optimization. Subtract 15 degrees for summer peak.
Shading Analysis
Even partial shade devastates output. One shaded cell can reduce entire panel performance by 50%. Map sun path throughout the day and across seasons.
Mounting Location
Roof mounts save space but require weatherproofing. Ground mounts allow easier maintenance and optimal positioning.
Step 2: Install the Mounting System
Mounting System Installation
For Roof Mounting
- Locate and mark roof rafters or trusses.
- Install mounting brackets with lag bolts into rafters.
- Apply weatherproofing flashing or sealant.
- Attach rails to mounting brackets.
- Leave 3 feet between panel rows for maintenance access.
- Verify rails are level and properly spaced.
For Ground Mounting
- Mark locations and dig holes for concrete footings.
- Pour concrete and install mounting poles.
- Allow concrete to cure 24-48 hours.
- Attach horizontal rails to vertical supports.
GROUND MOUNT WARNING: Build your structure at least 4 feet off the ground. Lower mounts become grass jungles. More importantly, you need room to work safely when replacing panels or troubleshooting connections.
Step 3: Mount the Solar Panels
Panel Mounting Process
This step works better with a helper. Panels are awkward to handle alone.
- Inspect each panel for shipping damage.
- Attach mounting hardware to panel frames.
- Lift panels onto rails with your helper.
- Secure panels using mid-clamps and end-clamps.
- Tighten firmly but do not overtighten.
- Leave small gaps for thermal expansion.
Every panel you mount is one step closer to freedom. No more utility rate hikes. No more begging the power company during outages. Your hands are building something that will protect your family for decades. That feeling of independence is worth every minute of work.
Step 4: Wire the Solar Array
Array Wiring
SAFETY FIRST: Cover panels with opaque material before wiring. Panels generate voltage from any light source. Treat every connection as if it is live. Wear insulated gloves.
Series Wiring (Higher Voltage)
Connect positive terminal of one panel to negative of the next. Use for systems with higher voltage charge controllers.
Parallel Wiring (Higher Current)
Connect all positives together. Connect all negatives together. Use for lower voltage systems.
Wiring Best Practices
- Use proper MC4 connectors throughout.
- Ensure all connections are waterproof.
- Secure wires with UV-resistant zip ties.
- Run main cables through conduit for protection.
- Leave slack for movement but prevent dangling.
Step 5: Install the Charge Controller
Charge Controller Setup
The charge controller protects your batteries. Install it correctly and your batteries last years longer.
- Mount controller on vertical surface in dry location.
- Position near batteries to minimize voltage drop.
- Ensure controller is switched OFF before connecting.
- Connect to batteries FIRST. This is critical.
- Double-check polarity before each connection.
- Connect solar array to controller after battery connection.
CONNECTION ORDER MATTERS: Always connect batteries to charge controller first. Then connect solar array. Reversing this order can damage your controller instantly.
Free Solar System Sizing Calculator
Avoid the mistake that cost me $15,000. Size your system correctly the first time.
Get Free CalculatorStep 6: Set Up the Battery Bank
Battery Bank Installation
- Place batteries in ventilated, temperature-controlled space.
- Use non-conductive surface or spill-proof container.
- Wire batteries in series to increase voltage.
- Wire batteries in parallel to increase capacity.
- Use properly sized interconnect cables.
- Ensure all connections are tight and corrosion-free.
- Install fuse or breaker between bank and system.
WATTSON'S BATTERY SECRET: "LiFePO4 or regret."
My first system used lead-acid batteries. Constant maintenance. Dead after four years. The replacement LiFePO4 bank has run twelve years with zero maintenance. The upfront cost was higher. The lifetime cost was far lower. Trust the sasquatch on this one.
Step 7: Install the Inverter
Inverter Installation
The inverter converts DC battery power to AC household power. Choose pure sine wave for sensitive electronics.
- Mount inverter in cool, dry, ventilated location.
- Keep separate from battery compartment if using lead-acid.
- Ensure inverter is switched OFF before connecting.
- Connect to battery bank with properly sized cables.
- Install overcurrent protection between batteries and inverter.
- Install remote display in accessible location.
Step 8: Ground the System
System Grounding
Proper grounding protects against lightning and electrical faults. Do not skip this step.
- Install grounding rods near array and equipment.
- Connect all metal components to grounding system.
- Use proper gauge grounding wire throughout.
- Ensure all grounding connections are tight.
- Protect connections from corrosion.
- Follow local electrical codes for specific requirements.
Step 9: Test and Document Your System
Final Testing and Documentation
- Double-check all connections for polarity and tightness.
- Verify all components are securely mounted.
- Ensure all breakers and disconnects are OFF.
- Uncover solar panels and check voltage with multimeter.
- Turn on battery-to-controller connection first.
- Monitor charge controller for proper operation.
- Turn on inverter and verify AC output voltage.
- Test each outlet or connection point.
- Monitor system for several days through weather changes.
Create Maintenance Documentation
- Detailed system diagram with all connections
- Component manuals and warranty information
- Installation date and baseline performance readings
- Maintenance schedule for cleaning and checks
- Emergency shutdown procedure posted near equipment
Can a beginner really do DIY solar installation?
+Yes. DIY solar installation requires basic tool skills and attention to instructions. Components are modular. Connections are standardized. Most homeowners complete installations in one to two weekends.
How much can I save with DIY solar installation?
+DIY saves 50-70% versus contractor quotes. A $25,000 professional system often costs $8,000-$12,000 for DIY. Labor is the largest cost in professional installation.
Do I need permits for DIY solar installation?
+Requirements vary by jurisdiction. Some areas require permits and inspections. Others allow off-grid installations without permits. Check local codes before starting.
What tools do I need for DIY solar installation?
+Essential tools include drill, wire cutters, multimeter, wrench set, and ladder. You also need insulated gloves and safety glasses. Most homeowners own most required tools.
How long does DIY solar installation take?
+A basic system takes 1-2 weekends for most DIYers. Larger systems may require 3-4 weekends. Planning and gathering components adds another week before installation.
What happens if I wire something wrong?
+Reverse polarity can damage charge controllers and inverters instantly. Always double-check connections before powering on. Use a multimeter to verify polarity at each step.
Can I expand my system later?
+Yes. Design for expansion from the start. Choose charge controllers and inverters with capacity above current needs. Match new panels and batteries to existing specifications.
Do I need an electrician for any part?
+Off-grid systems typically do not require electricians. Grid-tie systems may require licensed electrical work for utility connections. Check local requirements for your situation.
What maintenance does a solar system need?
+LiFePO4 systems need minimal maintenance. Clean panels occasionally. Check connections annually. Lead-acid batteries need monthly water checks and equalization charges.
Where can I get location-specific guidance?
+Use our OffGridPowerHub GPT for permit requirements, sun hours, and regulations specific to your zip code.
Conclusion: Build Your Energy Independence
DIY solar installation puts power in your hands. Literally. You control the quality. You control the cost. You understand every connection.
The skills you learn outlast any contractor warranty. When problems arise at 2 AM during a storm, you fix them yourself. That capability is priceless.
Start with proper planning. Follow safety protocols. Take your time with each step. Your system will reward you with decades of reliable, free power.
Ready to Size Your System?
Calculate exactly what you need before buying a single component.
Get Free CalculatorLocation-Specific Questions?
Get permit requirements, sun hours, and regulations for your zip code.
Ask the GPT